Visual Thinking Exercises for Engineers
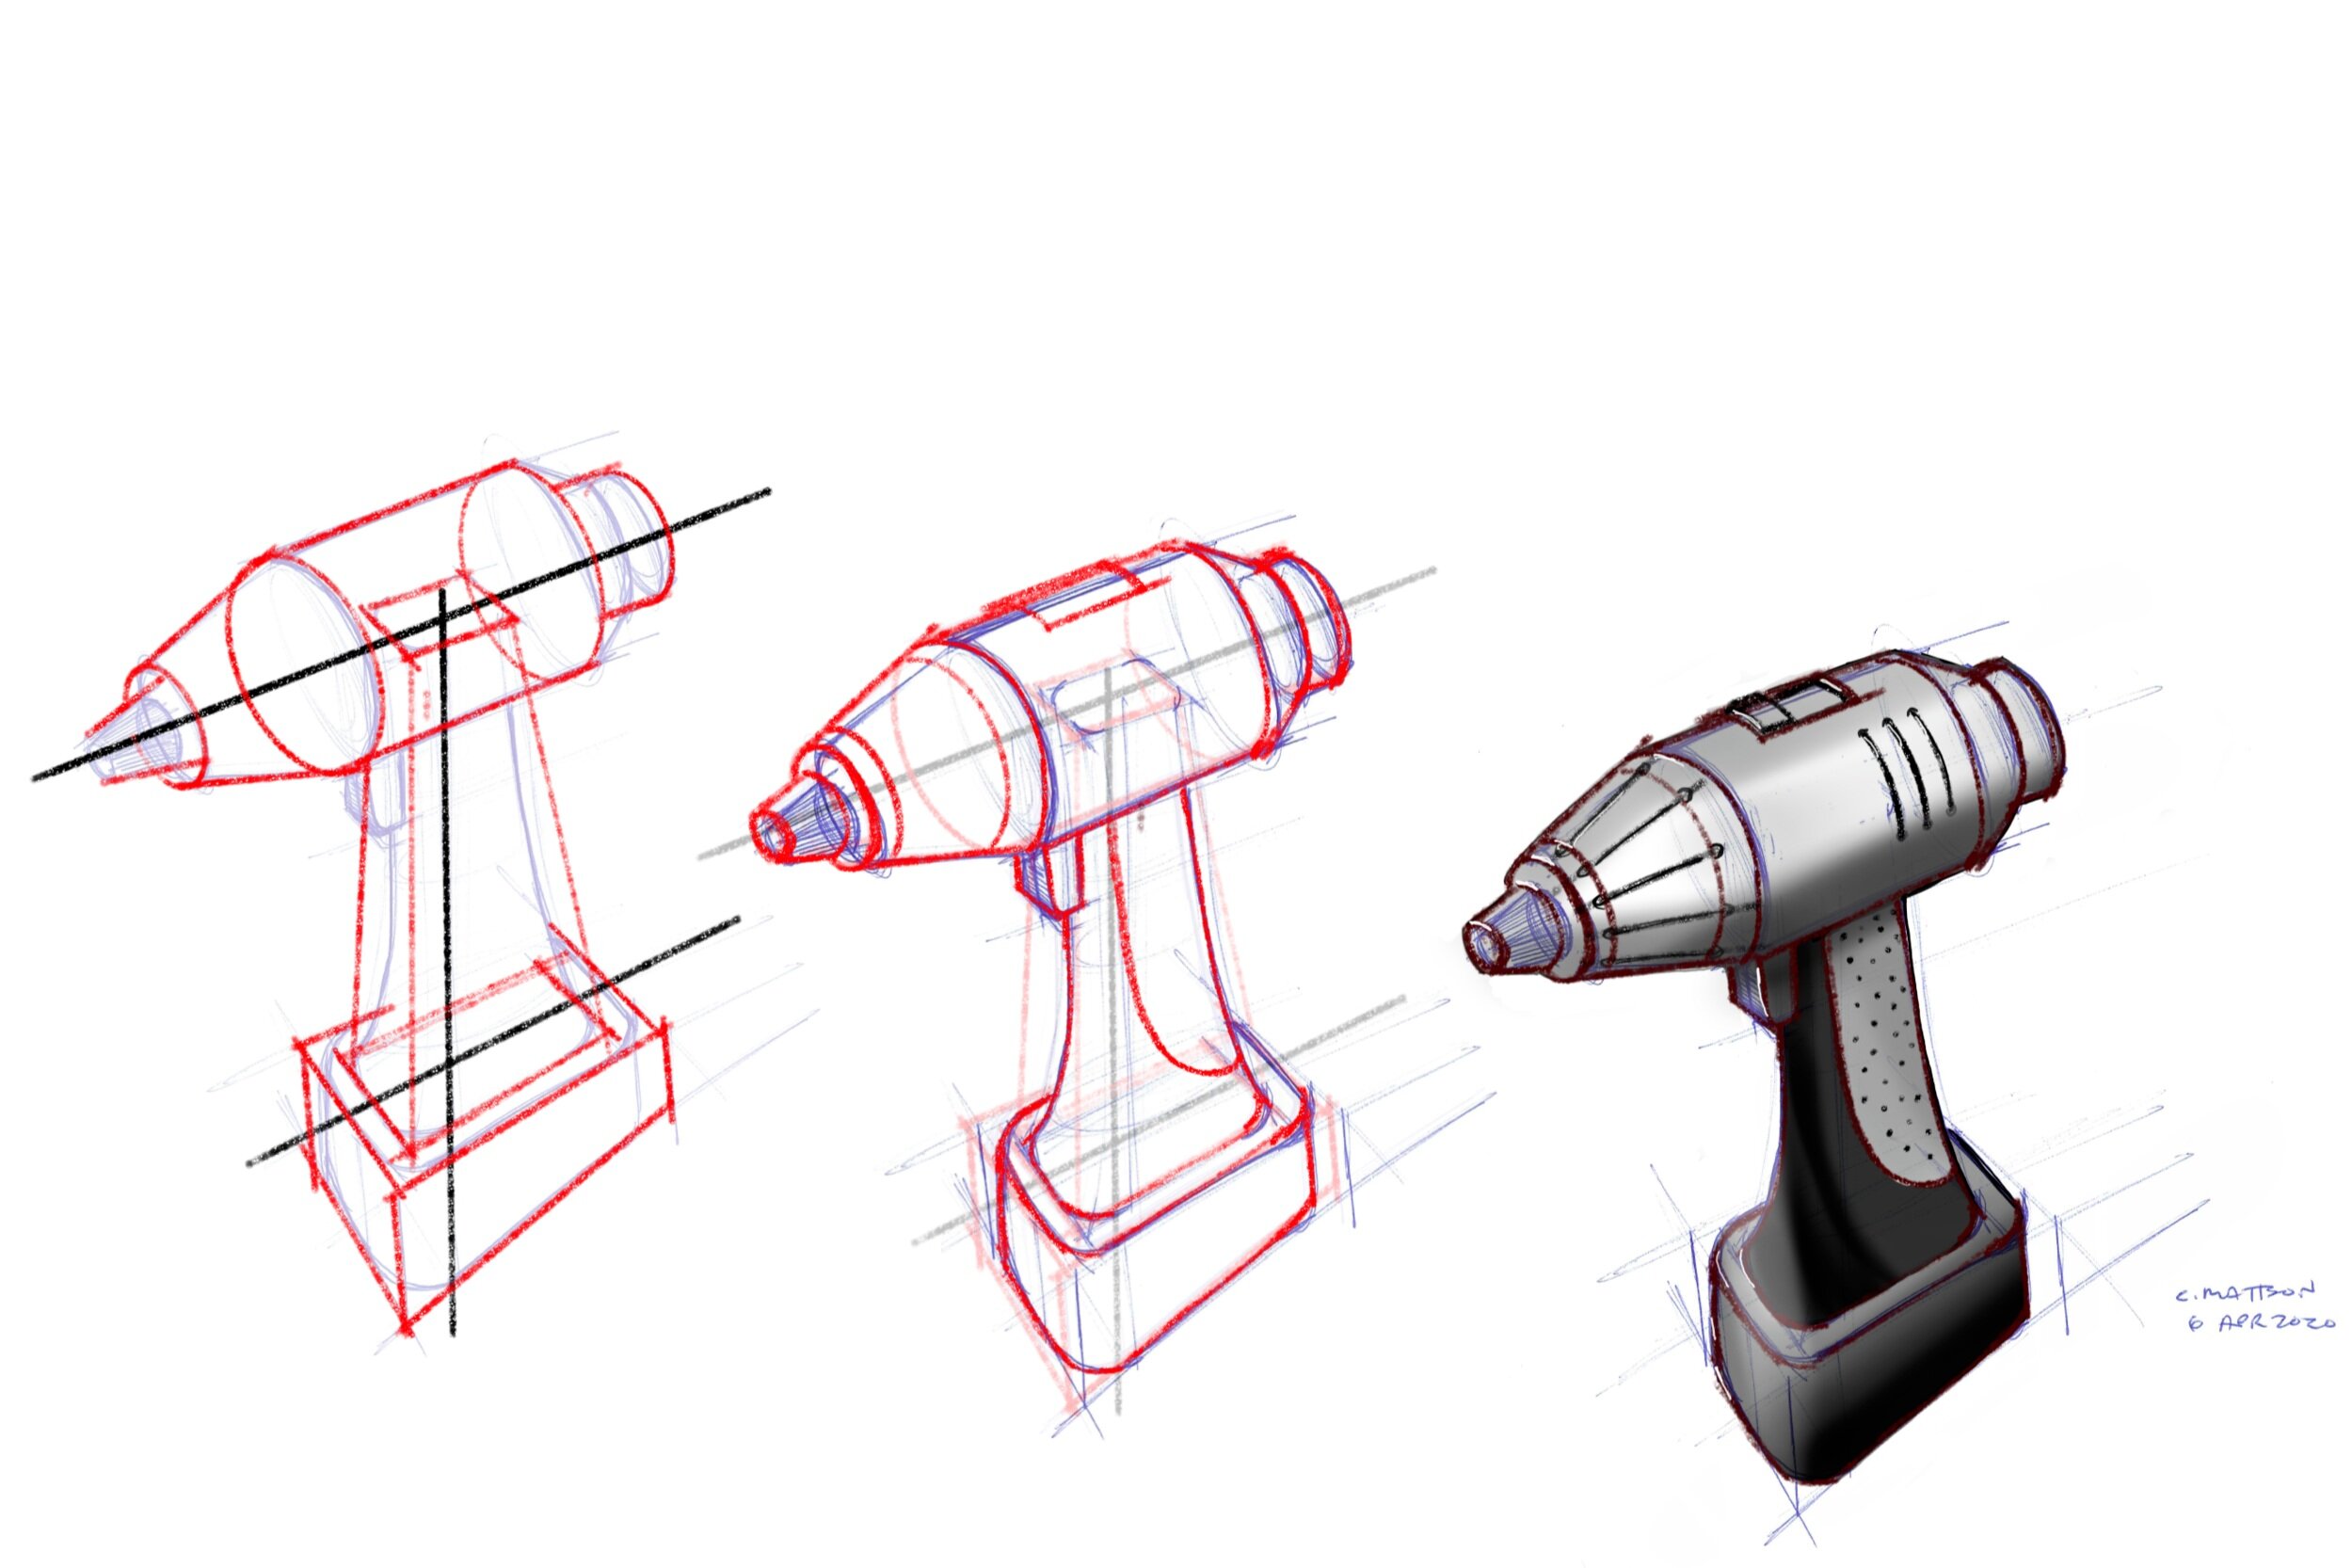
Many engineers are visual thinkers [1]. They use this skill to envision new products they are designing, to work through spatial issues they’re experiencing with a design, or to simply understand how an existing product works.
When creating a new part or product, it is helpful for the engineer to sketch out what he or she envisions. This is useful so that the engineer can see and fix problems with the design and so that he or she can share their vision with others, such as decision makers, collaborators, or potential customers.
Visual thinking skills enables good sketching. Good sketching facilitates rapid design iteration. Good design emerges from significant iteration. Based on this logic, visual thinking skills are foundational to good design.
Visual Thinking Exercise Introduction and Example
Consider the image shown here. It begins with 2D Shapes (left), which are provided as the starting point of the exercise. The numbers within the boxes of the 2D shape represent an extrude height from the 2D plane, as shown in the Extruded Solid (middle) portion of the image. To clearly see the three different sides of the extruded shape, each face direction is shaded differently, as shown in the right side of the image (labeled Shaded with Shadow). Note there are only three shades, one for each of the three orthogonal directions in the 3D space. Also present on the right-side image is a shadow of the shape cast onto a vertical wall one unit behind shape, as shown.
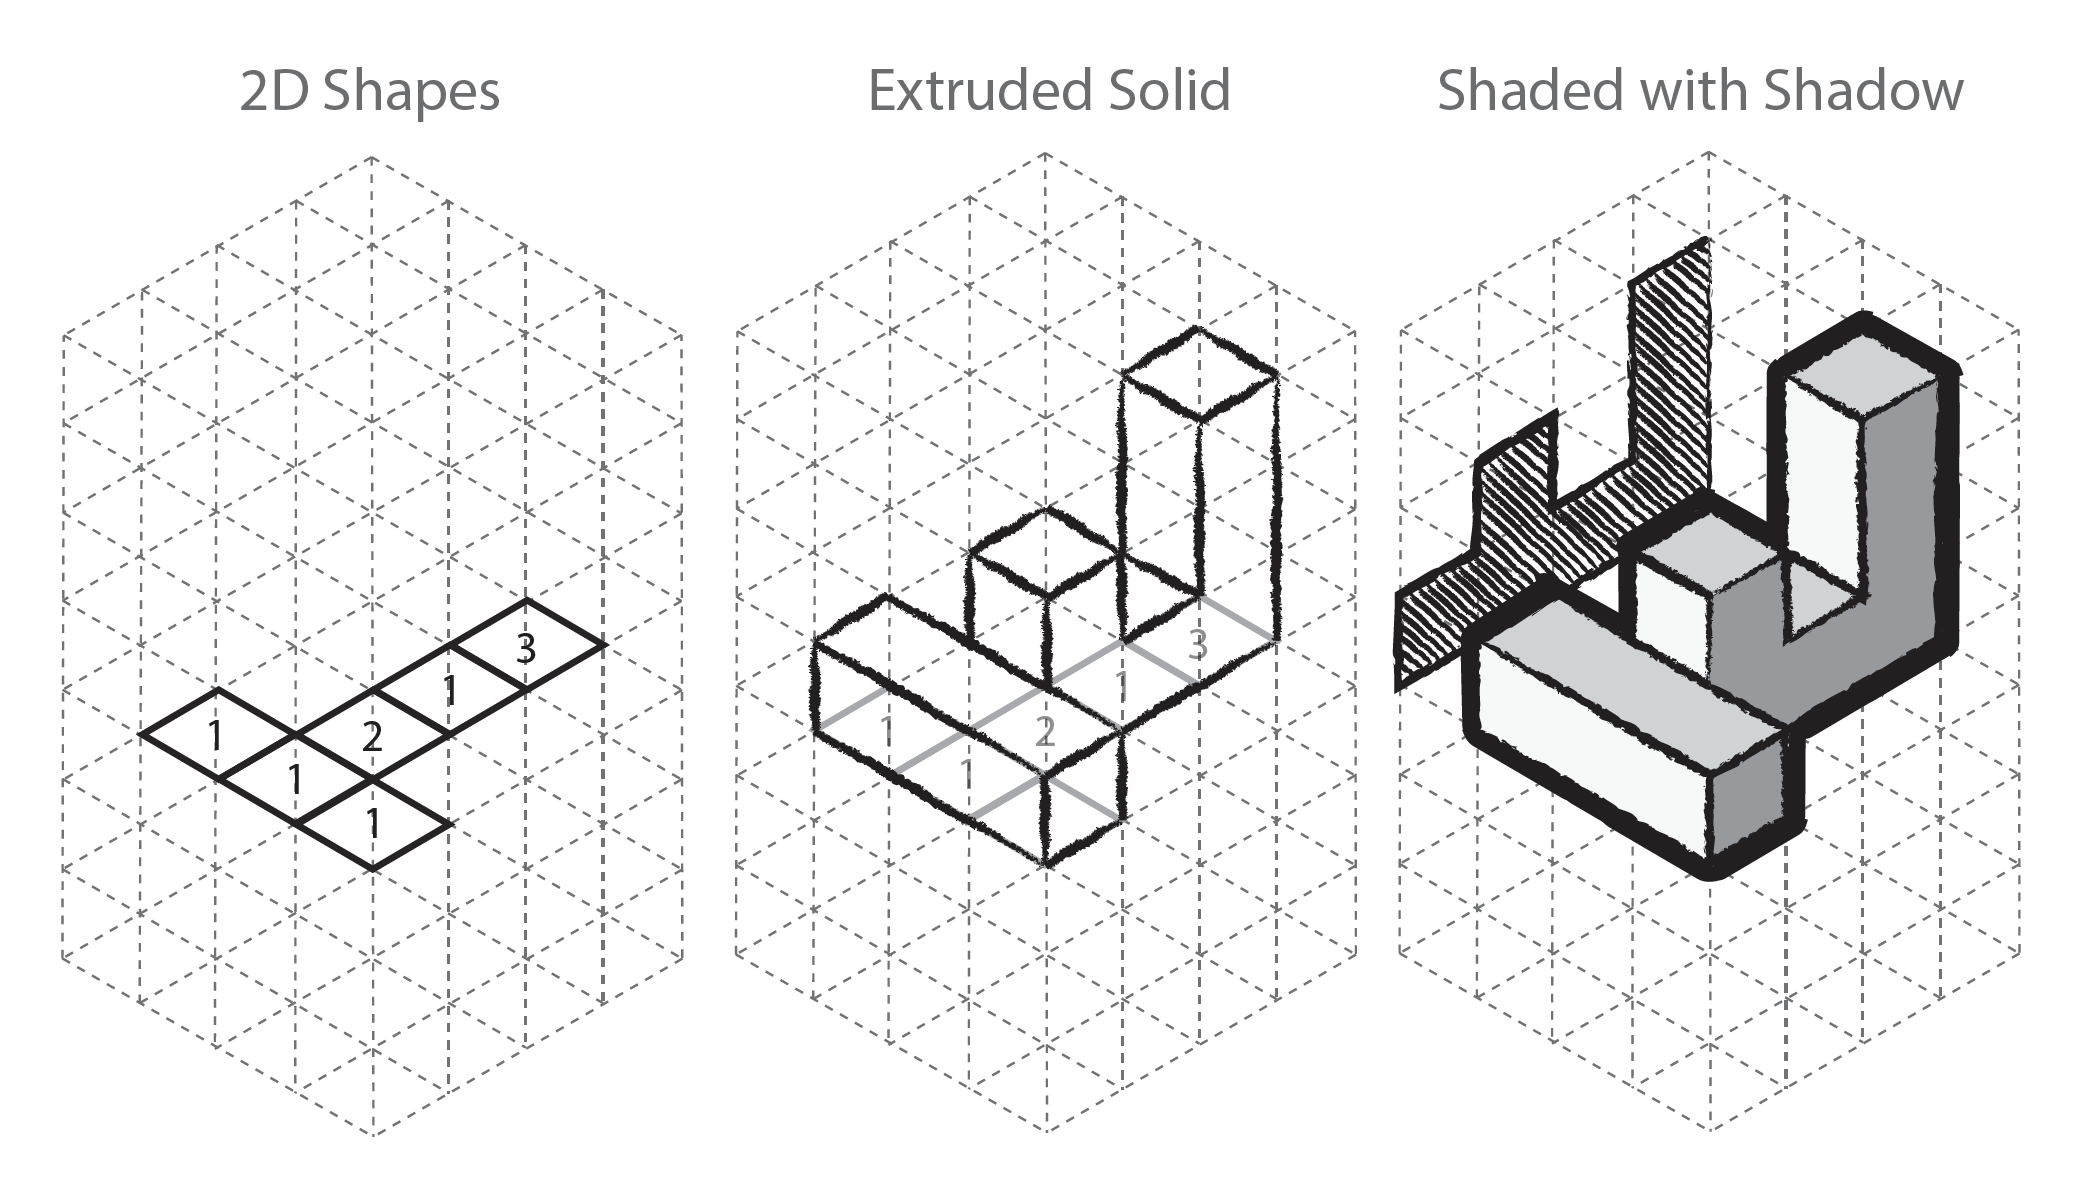
The portion of the exercise described above helps you develop skill (i) in visualizing and creating a 3D shape given 2D information, (ii) in recognizing and visually representing the orientation of different faces on the 3D shape, which is accomplished by shading, and (iii) visualizing the profile of 3D shape as projected onto a wall.
The next part of the exercise is represented by the image shown below. The two solid objects shown to the left of the arrow must be rotated and stacked to produce the Assembly of Solids shown on the right side of the arrow. The resulting shape is a 3x3x4 cuboid where the resulting cuboid has no voids and no over lapping material from Solid 1 and Solid 2.
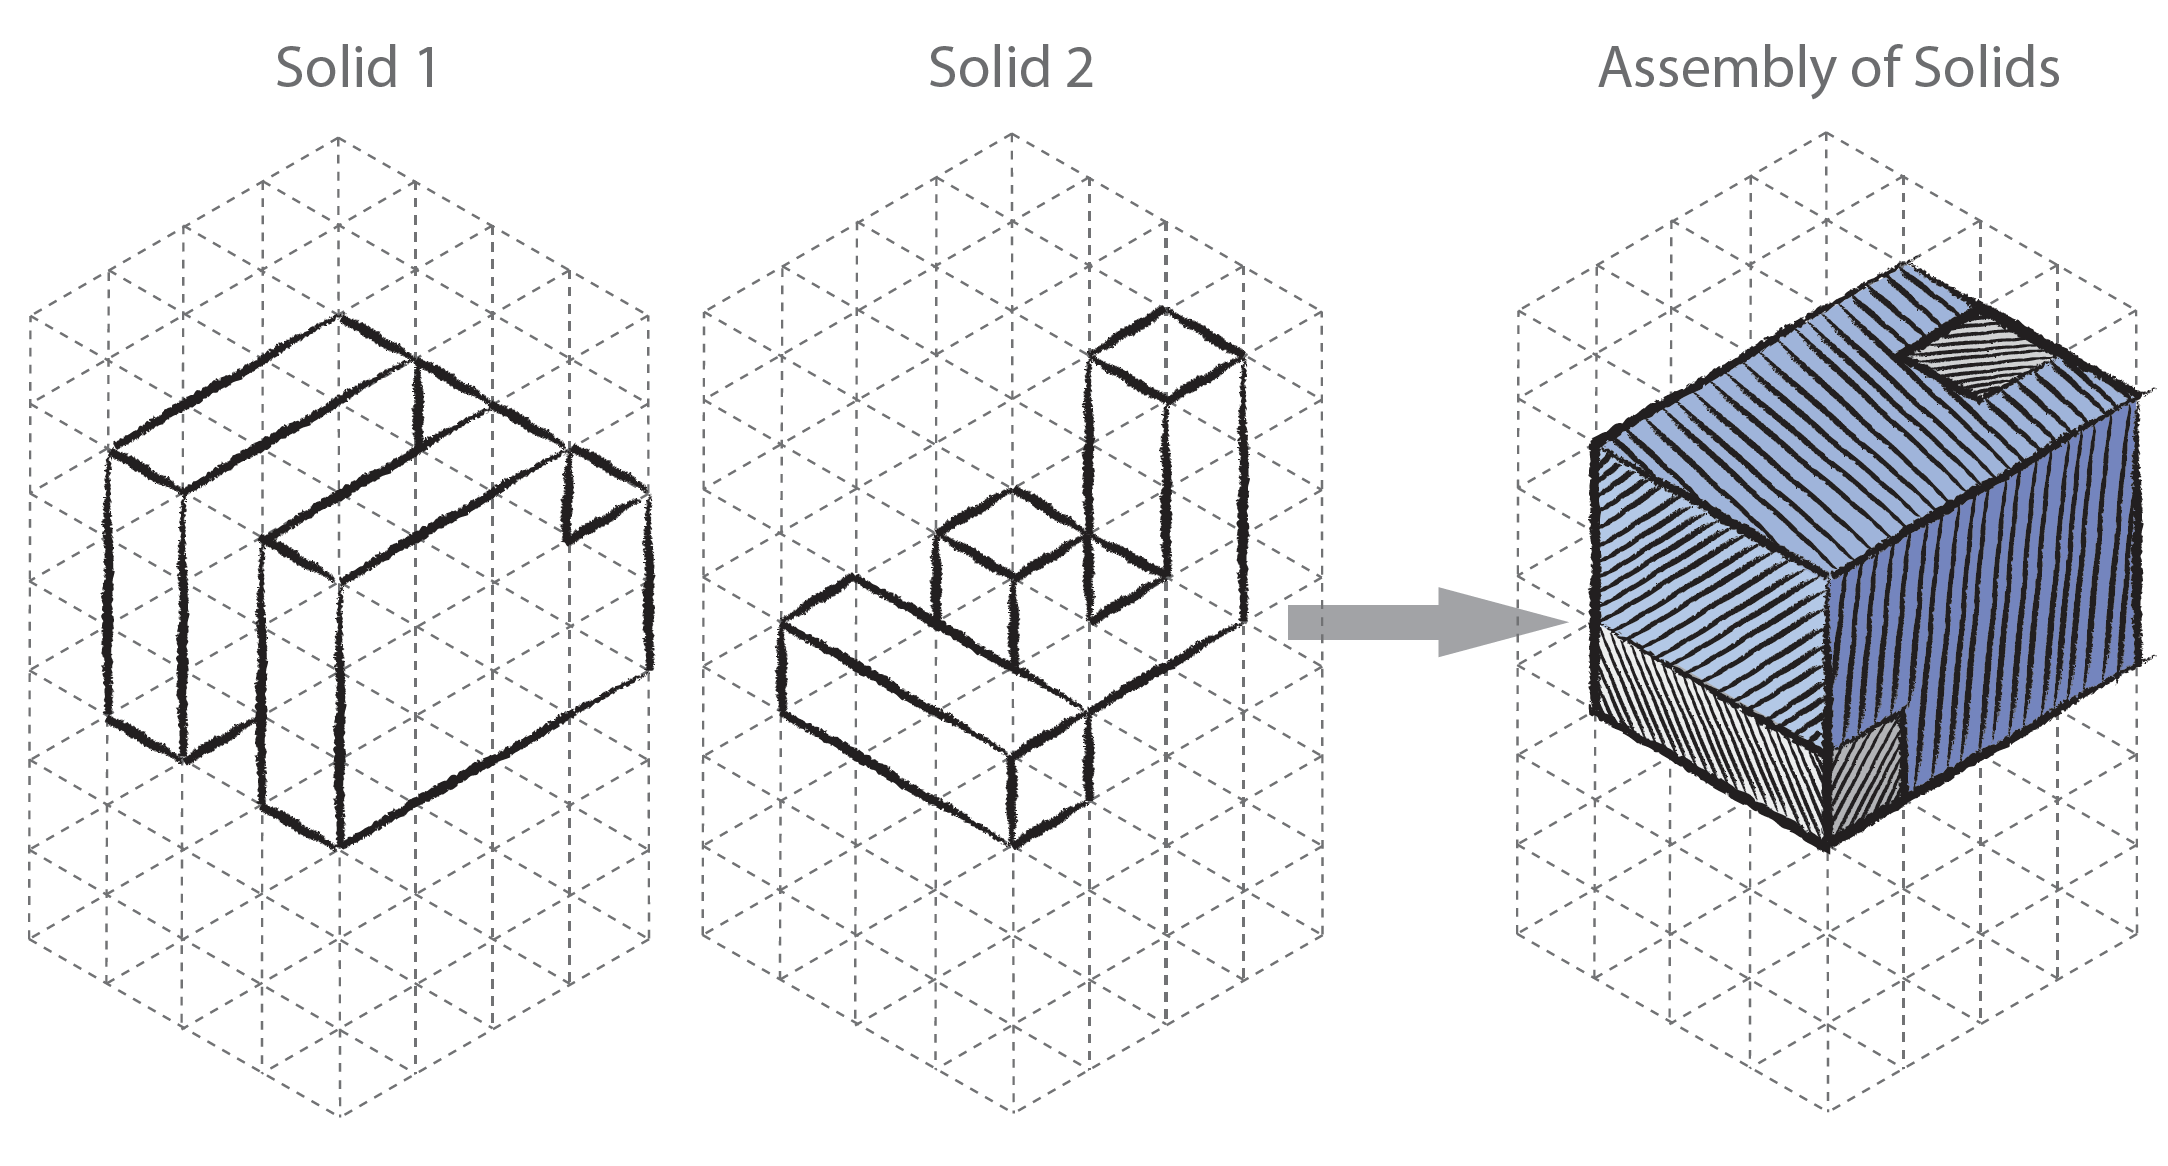
This part of the exercise helps you develop skill in (i) visualizing how the solid objects can be rotated in space to meet the condition that when assembled they form a desired shape, and (ii) helps you visualize and keep track of the different parts used in the assembly (by coloring them differently).
Visual Thinking Exercise
This exercise is best carried out by downloading and printing the following PDF. You may also download and check the answers here.
1. Consider each of the 2D shapes shown in (a)-(d), below. Each shape is a set of squares on a single plane that is being viewed isometrically. The number on each box represents the out-of-plane height each square should be extruded to create a solid. Create the solid for each shape and complete steps 2-4. Refer to the example as needed.
2. Uniquely shade or crosshatch each of the three surfaces (surfaces seen from front, right, top directions). Refer to the example.
3. Project a shadow — and crosshatch it — onto a plane one unit behind the solid to the left. Refer to the example.
4. Use a Sharpie to draw a bold outline around the outer edges of the solid to make it pop out of the page. Refer to the example.
5. For shape A1 (A1 means assembly 1), assemble (a), (b), and (c) together into 3 by 2 by 4 cuboid. Uniquely color each part, and crosshatch each surface of each part differently, as shown in the example. There are 4 correct answers; you only need one.
6. For shape (e), determine the extrusion heights that would produce a solid 3 by 3 by 4 cuboid (box) if turned upside down and placed onto shape (d). Do steps 2-4 above for shape (e) in the right side up position.
7. For shape A2, assemble (d) and (e) together into a 3 by 3 by 4 cuboid. Also color/hatch the surfaces as in step 5 above.
8. Critically evaluate your work against the solution, and make corrections as needed.
TIPS: Do your best work. The goal is not to do the exercise, but instead the goal is to become better at 3D visualization and sketching while you are doing the exercise.

References
[1] A. Mallinson, Visual Thinking for Engineers: Associate professor Maria Yang studies the importance of early-stage design, MIT News, 10 Sep 2014. https://news.mit.edu/2014/visual-thinking-engineers, accessed 17 Oct 2022.
To cite this article:
Mattson, Chris. “Visual Thinking Exercises for Engineers.” The BYU Design Review, 17 Oct. 2022, https://www.designreview.byu.edu/collections/visual-thinking-exercises-for-engineers.